Ladies and gentlemen, this article will explain how we can capture a 360-degree image and post it on Facebook. First of all, we'll need a free package at Unity Asset Astore.
Basically we need a panorama image, save it in .JPG format and finally change two image properties, which is the name of the camera and the model.
So let's go.
1st - Access the Asset Store, inside Unity, to navigate to Windows, Asset Store. You must be authenticated to download the package, 360 panorama, panorama Unity, 360 panorama capture

Image 1: Menu Asset Store.
2nd - Now search for asset name 360 Panorama Capture. Click in the name asset to open your page.
Asset link: https://www.assetstore.unity3d.com/en/#!/content/38755
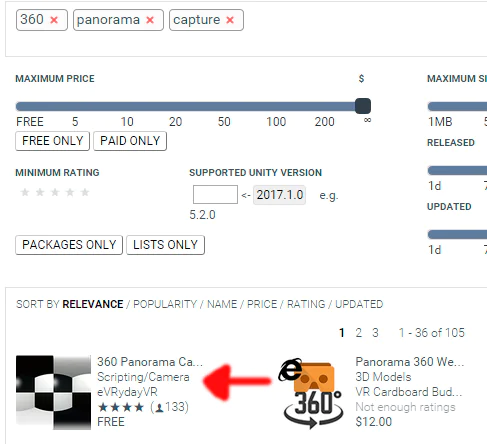
Image 2: Search for asset.
3rdº - Now click the Import button, so you will make a copy of the asset for your current project.
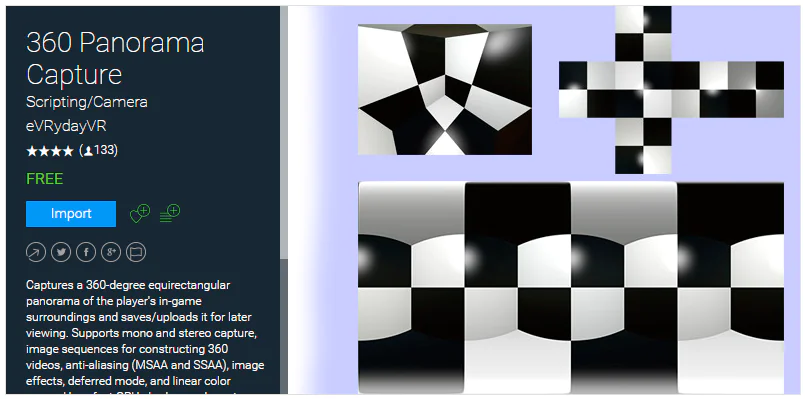
Image 3: Importing the 360 Panorama Capture Asset.
4th - A confirmation window should appear, by default all files are already selected, click the import button.
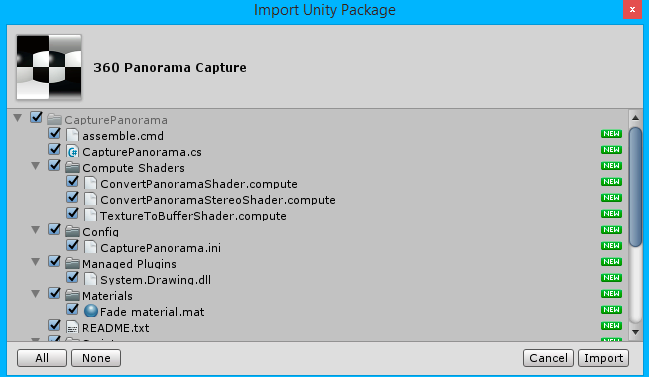
Image 4: Import window.
5th - We need to associate a script with some GameObject, so to make our project more organized, create a empty object and give it a meaningful name.
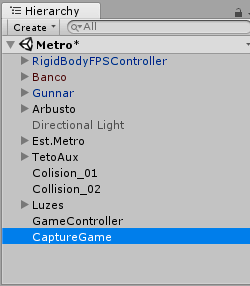
Image 5: Insert GameObject and rename.
6th - Now drag the Capture Panorama.cs script to the GameObject you just created. This script is inside the CapturePanorama folder, which was imported from the Asset store.
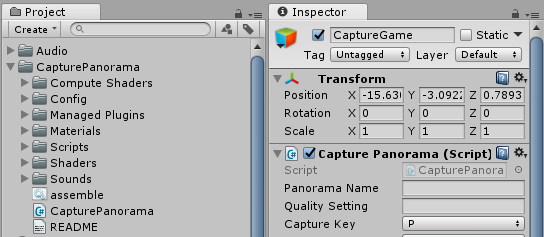
Image 6: Associating the script with the GameObject.
8th - Now we need to make a configuration, but specifically to change the format for JPEG, because Facebook does not work with panomed images in PNG. Other settings that you can change, but it is optional, this article only changed the format of the image. Change the Image Format to JPEG.
Panorama Name: Name of the image after capture.
Capture Key: Key that triggers capture.
Panorama Width: Image width.
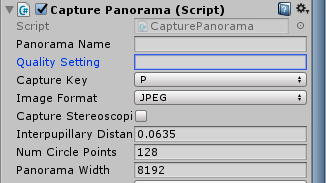
Image 7: Change the Image Format to JPEG.
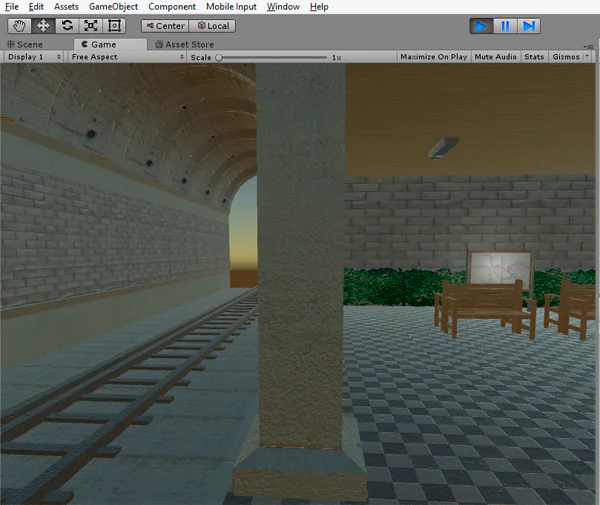
9th - Now we need a camera on the scene, for this example I used the 1st Person Controller, as this makes it easier to find a position. When you find the perfect point, press the key configured to capture it, in my case it is the default key P. The screen will blink and the image will be saved in the folder of your project.
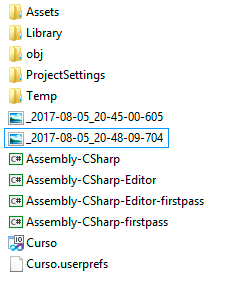
10th - Now navigate to the folder of your project, and see that the image is already there.
11º - To finalize our settings, we will need to right click on the image, click on properties, details. In the name of manufacturer enter ricoh, in model camera insert ricoh theta s. Click Apply and OK.
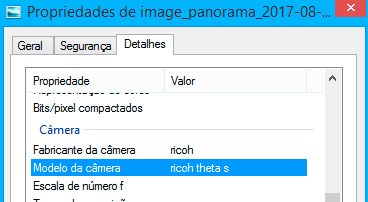
Image 8: Fixes the details of the Camera.
12th - Everything ready for you to publish your image on Facebook, you can even use the Facebook Edit tool to mark where the display should start.

Image 9: Posting the image to Facebook.
Check out this example: https://www.facebook.com/satellasoft/photos/a.394325307322915.92287.382499698505476/1491746860914082/?type=3&theater
I hope you have learned, any questions leave in the comments!
A big hug and see you next time!
Tutorial em vídeo em Português.